Updating WordPress components like themes, plugins and even the core CMS is a regular process. There are mainly two types of update procedures. The first one can be performed automatically (in a background) with few clicks of the mouse. This method mainly works for the core and the themes/plugins you’ve installed from the native WP repository accessible from the dashboard.
But if a plugin/theme was uploaded by the user and then installed on the WP setup, that component wouldn’t be eligible for automatic/background update. Generally, premium themes and plugins need to be updated manually which is a bit trickier.
When your theme author prepares an upgrade, they would notify you via email or your user dashboard on their site. Download the latest version of the theme when available.
Remember, before updating any theme or major plugin, it’s recommended to create a backup of the total WordPress installation so that you will be able to revert the changes should any unexpected situation arises. If the theme you are going to update is currently live on your site, first activate another theme to deactivate the target theme. This will make your site look different until you activate the latest version of the target theme. Okay, assuming that you are aware of these issues, let’s step forward.
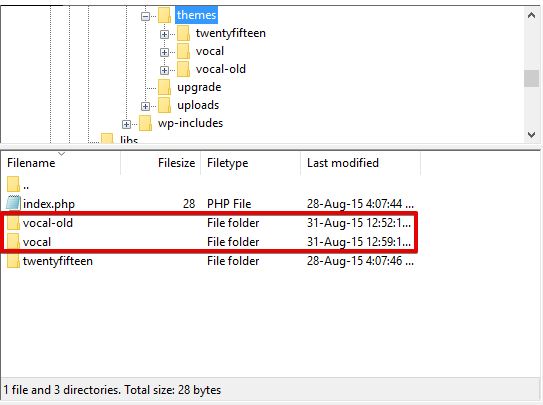
Visit your site’s cPanel or use an FTP program (e.g. Filezilla) to explore your site’s root directory. Then go to public_html/wp-content/themes.
Say, the name of the theme you want to update is “vocal”. In this case, you should see a folder named “vocal” in the themes folder. In order to upload the new version, you must leave the old version of the target theme. Simply rename the target theme’s folder. According to our example, we need to rename the folder from “vocal” to “vocal-old”.

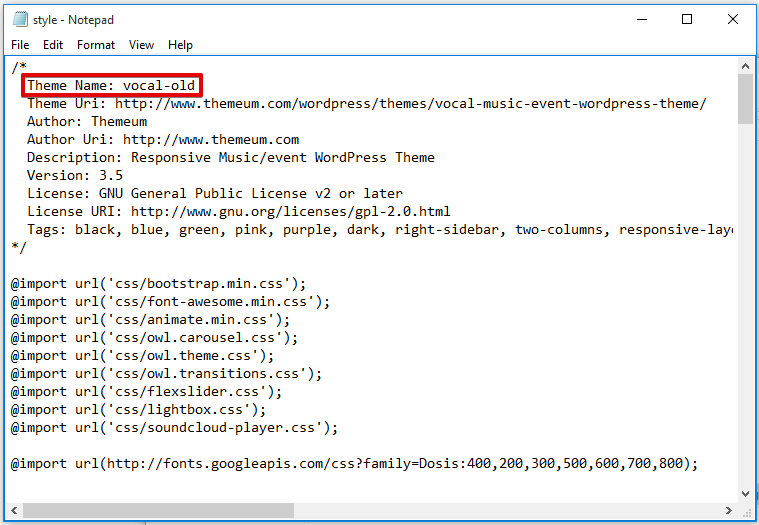
Also enter into the ‘vocal-old’ folder, open the style CSS file and edit the Theme Name field as “vocal-old”.

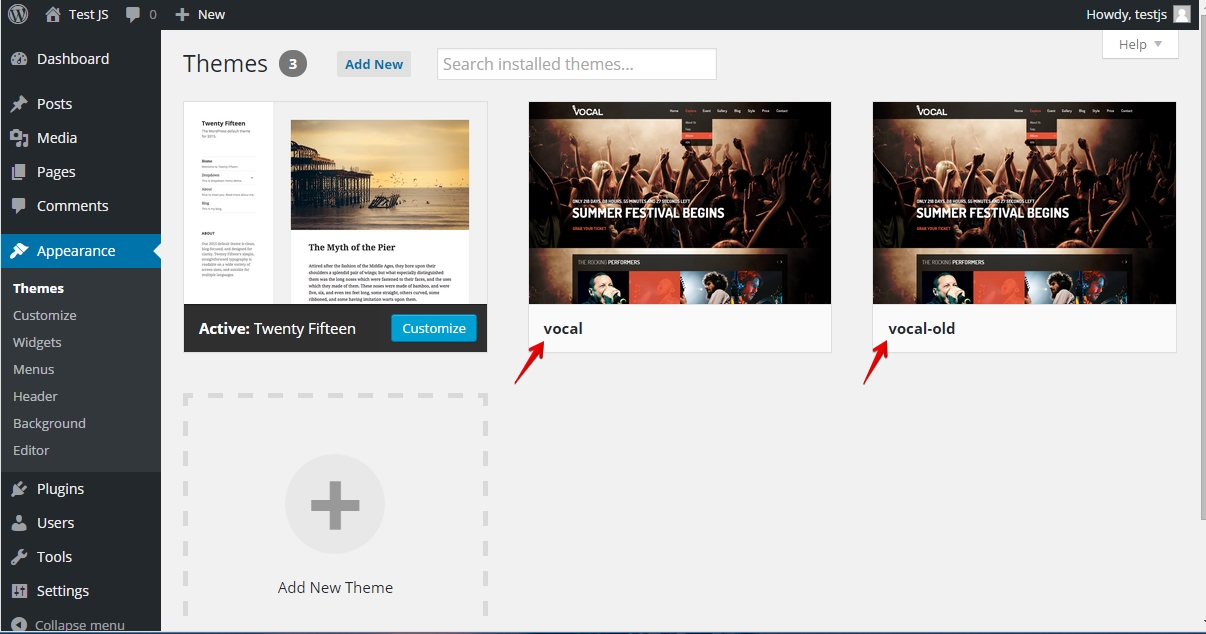
Once you’ve renamed your target theme folder, you are ready to upload its latest package to your site. Upload it (a zipped folder) to the themes folder (public_html/wp-content/themes) from your computer and extract it. Now visit your site’s Dashboard > Appearance > Themes. Since you’ve renamed the older version as “vocal-old”, the theme selection board will now show two themes with different names.

You can easily recognize and activate the latest theme from there. The old theme’s name will be shown as “vocal-old” while the latest one will be named as just “vocal”. After setting up everything, you may download the old theme folder (as a backup) and then delete it from server.
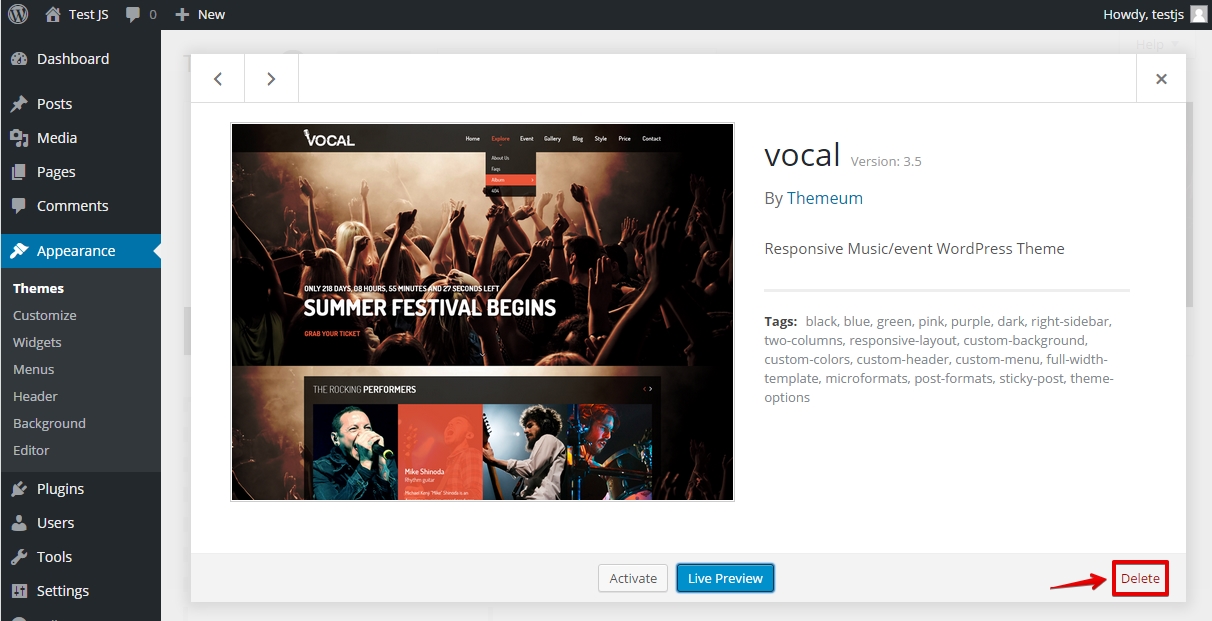
Visit your site’s dashboard and go to Appearance > Themes. Hover mouse on the target theme, click Theme Details link. Now delete the old version of the target theme.

After deleting the old version of the target theme, upload the newer package from your computer. The system will unpack and install the package. Now you can activate the latest theme on your site.

Warning: Updating or upgrading a theme will reset the customizations you’ve made in the previous version. You need to use a child theme to retain those customizations. Advanced themes often come with some dependency plugins. Install and update those dependencies separately (if necessary). Hopefully, I’ll discuss child themes and manual plugin updates in upcoming posts. Hope you will be with us. Thanks.