WP Crowdfunding is now Growfund — the new era of fundraising!
WP Crowdfunding is now Growfund!
WP Crowdfunding is now Growfund — the new era of fundraising!
WP Crowdfunding is now Growfund!


November 26, 2018
Share
Do you want a website that is absolutely stunning to the eyes? Everyone does, right? However, without much knowledge on graphics or Photoshop, you might find yourself at a sticky situation. Today we introduce a whole new set of functionalities that you get with the Blend Mode option in WP Page builder.
It can be pretty frustrating to keep switching between Photoshop and your current page builder. Luckily WP Page Builder aims to be a one stop place where you get everything you need to make your website.
To keep in line with that very aim, we have now introduced our awesome new blend modes! You can simply try out all the variations of blend mode in the visual editor and choose the one that works best with your website. No need to go to complex CSS coding as you can turn your images lit from right here!
So let’s reveal everything amazing about blend modes and how to use it right here.
In case you’re completely new to the visuals scene and don’t know what blend modes are, this section is for you.
Blend modes are essentially putting one layer or image on top of another or “blending” of two layers. It’s sometimes done to hide an image superficially that’s on the background.
There are a lot of possibilities on how you choose to put the upper image or “active layer” on top of the bottom layer. Hence you get a lot of blending modes or options. Instead of depending on Photoshop, you get the opportunity to use blend mode right in your WP Page Builder.
Like all other functions of WP Page Builder, using the blend mode is super easy too. All you have to do is go to the style settings and select where you want the blend mode in your layout. Go to row settings and choose your preferred background. Then select your overlay image, color gradient- anything you want!

WP Page Builder offers the most popular ones as well as a few different ones so that you have a lot of options.
The blend modes include:
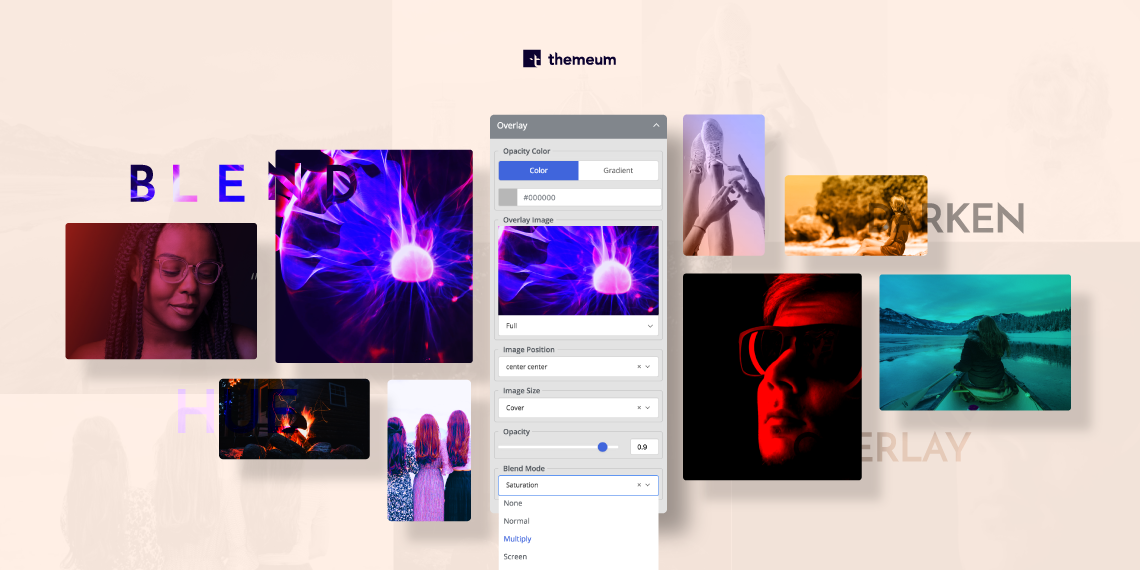
To get a further idea on how you can transform the outlook of your website with stunning and interactive designs, check out the collage below.


Imagine being on Instagram. Remember how you just put filters and see which one makes your image look the best? Use that very concept for your website. Blend modes take some trial and error so try out all the options you have and select the perfect one. If you think this is too good to be true, click on the live preview button below!
Blend Mode Preview
It’s completely okay to be confused on which one to choose when you have such a huge selection.
So we tried making some awesome designs using our blend mode and the results are spectacular! Check out some of our blend modes in action below.

You can make your images stand out by using the Multiply blend mode. We used the cult favourite black and red gradient to create a bold look that attracts visitors immediately to the face and the text. You can adjust the opacity using the slider in our settings so you can choose how bold you want the gradient to be in your images.

If you want to accentuate your fonts, one of the easiest ways to do so is using the Darken Blend Mode. When you put the darken blend mode in images and place your font on top, the combo makes it pop! Instead of using the age old concept of black and white, you can put different images and then use darken blend mode for a really catchy effect. If you’re wary of using a black or grey base for your layout, you can choose any other lighter shades and then apply darken mode.

You can use the simple settings of our Lighten Blend Mode to create designs that look sophisticated without taking hours on Photoshop. In this design we used a black and white image of a cityscape as the fixed background. Then we placed the overlay image on top. Using the lighten blend mode we were able to get this cool effect by superimposing light and dark images.

You can create a super retro or a classic black and white layout using the Saturation Blend Mode. We decided to make the image look vibrant with the saturation blend mode. Saturation blend mode works really well when you want to keep the hue of the background while keeping the saturation of the blend layer. You can even create grayscale effects with the saturation blend mode. This gives a really rich and vibrant rich looks and makes the details stand out really well.

Overlay Blend Mode is one of the most popular blend modes used in Photoshop. You can now create the overlay blend mode without Photoshop in WP Page Builder. The reason why blend modes are so great is because they help a lot with shifting mid tones. You can manipulate dark blend color to darker tones and light blends to lighter tones. When you’re really looking for your base layer to shine through, go for the Overlay Blend Mode.
Videos are the easiest way to wow your audience. You can create amazing visual effects with the blend mode of WP Page Builder instead of sticking to only images. Here we used a black stencil as the blend image and kept the video as a background. On top of that you can apply any blend mode you want to really take your visuals to the next level! For a dark stencil, darken blend modes can be super complimentary or you can use the overlay blend mode to highlight the stencil more.
There are endless options when you’re experimenting with blend modes. WP Page Builder gives you all the options to get your website to look it’s real worth.
Visuals are an undeniable major part of your website and once you start playing with our blend modes, you won’t be able to stop!
Try out all our blend modes in our WP Page Builder and never have to limit your imagination!
Loving the blend modes? To make your visuals even better, see how you can use Animated Headings in WP Page Builder!

